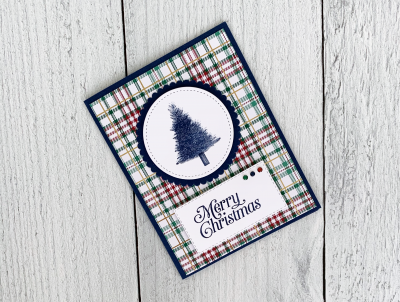
Happy Monday! This week we are going to be flipping around between Christmas, Halloween and Thank Yous. I love making cards for all these occasions – what about you? Today's card is a super cute Christmas card using the new Perfectly Plaid stamp set along with some other goodies.
Did you know we are in the throws of the Twelve Weeks of Christmas emails? If you're not on the list – be sure to use this link to get there. You'll know you're “on the list” because you received three new tutorials on Friday! We are just nine short weeks away from Christmas, but if you get all these emails you'll have loads of ideas to use this year and beyond.
I am having a blast playing with this stamp set. It comes in a bundle too with a cute tree punch. You'll see a sample using that later this week. I also can't get enough of the Wrapped In Plaid Designer Series Paper that coordinates with this set. Here's what that looks like:

Let's dive into making this card!
Measurements:
- Night of Navy – scrap and 5 1/2″ by 8 1/2″; score at 4 1/4″
- Wrapped in Plaid DSP – 4″ by 5 1/4″; 4″ by 1/2″
- Whisper White – (2) 4″ by 5 1/4″ – use one for stamping and die cutting and the other for inside the card

Instructions:
- Fold card and burnish with Bone Folder
- Stamp tree and sentiment on Whisper White
- Die-Cut tree with largest Stitched Shape Circle Die
- Die-Cut sentiment with third largest Stitched Rectangle Die
- Die-Cut scrap Night of Navy with second largest Layering Circle Scalloped Die
- Attach large DSP to front of card
- Attach small DSP to lower portion of Whisper White and attach Whisper White inside card
- Layer circles together with Dimensionals and attach to upper portion of card front
- Layer sentiment to lower portion of card font using Dimensionals
- Add one each of red, blue and green Holiday Rhinestones in upper right corner of sentiment
Stampin' Up! Supplies
Click on a picture to shop at My Store
Pin for Later
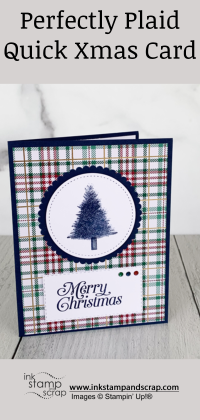
Pin this graphic below to your Ink Stamp and Scrap with Linda board on Pinterest so you can easily find this project again.

NEW CARD CLASS!

Need a little inspiration to get those Christmas cards started? Wouldn't it be great if all the measuring and cutting was done for you? If you answered YES to one or both of these questions you need my all new Wrapped In Plaid Card Class.
Early Bird special lasts until Friday, October 25 – don't delay! CLICK HERE FOR DETAILS AND TO REGISTER
Thank you for stopping by today, please be sure to . . .
- Receive a FREE PDF tutorial when you subscribe to my emails here.
- Earn up to a $50 shopping spree with my Ink Stamp and Scrap Rewards Program.
- Check out the clearance rack and save up to 70%.
- Save 10% on coordinating product bundles!
- The $99 Starter Kit is the best deal of ALL! Discounts & benefits here
- Visit my gallery for paper crafting ideas.
- Follow me on Pinterest.
- Follow me on Instagram.
- Subscribe to my YouTube paper crafting video tutorials.


Leave A Comment