Ever tried stacking die cuts only to end up with gluey fingers, sliding layers, and a not-so-perfect finish? There’s an easier way—and it’s a total game changer! In today’s tip, I’ll show you how to use adhesive sheets to get perfectly aligned, cleanly stacked die cuts without the mess. Whether you're adding dimension to words, shapes, or intricate designs, this simple trick will have you sticking, stacking, and smiling in no time!
While I'm going to try my best in this post to teach you about Adhesive Sheets the phrase “a picture is worth a thousand word” comes to mind when I think “an educational video saves you a ton of research time”. Maybe not the catchiest phrase, but I bet you can relate. When you ask google a question are you more likely to read an article or watch a video? I rest my case.
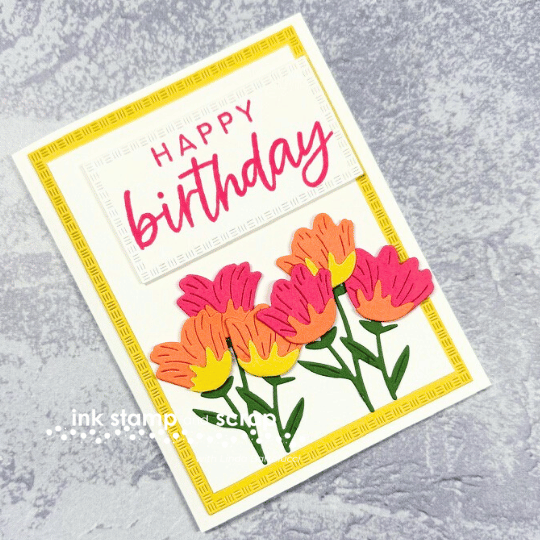
The Card
You'll find tips below on stacking your dies with adhesive sheets. Let me know in the comments if you'd like a video about using adhesive sheets.
The Supplies
If you like this project – here are all the supplies used. Simply click on an image to shop in my Stampin' Up! Store.
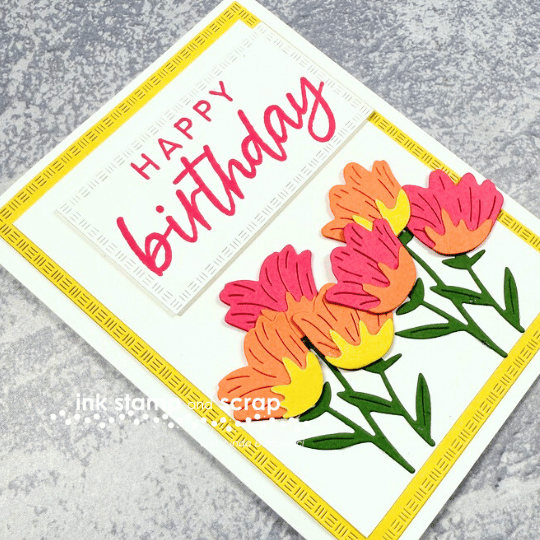
When making all the die cuts for this card, I used adhesive sheets for all the leaves/stems dies and the top layers of the flowers. Using these amazing sheets remove the mess from adding detailed dies to your cards. If you love the lack of mess, but want your adhesive sheets to have a little more wiggle room, keep reading – I've got you covered.
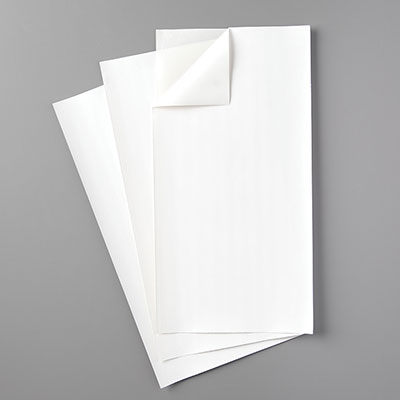
Basic Use of Adhesive Sheets
- Peel off one side of release paper and attach to scrap of card stock
- Die cut the card stock
- Peel off the other side of release paper and attach to project
You can add a little “wiggle room” for your detailed dies by doing the following:
- Follow all the steps above except attaching to your project
- Add a small amount of Multipurpose Liquid Glue to your Silicone Mat
- Take a scrap of card stock or plastic spoon and smooth the glue to a thin layer
- Tap your die in this layer of glue using the Take Your Pick Tool with the putty attachment to hold onto the die
- Now add it to your card and you should be able to move it a little before setting it in place
- With the adhesive side facing up add a
Let's Make It
Now let's make this cheery birthday card. If you're a crafter that likes to copy exactly down to the 1/8″ I've included the dimensions below as well.
- Fold and burnish the score line for the Basic White card base
- Die cut the largest rectangle from Darling Duck card stock and the medium sized one that the greeting will fit on from Basic White
- Add adhesive sheets to a scrap of Garden Green,Timid Tiger and Darling Duck card stock
- Die cut the greenery (2) and bases for the flower blooms from Timid Tiger (2) and Darling Duckling (3)
- Die cut the flowers from Timid Tiger (3) and Strawberry Slush (3)
- Stamp the greeting on the small rectangle in Strawberry Slush ink
- Attach all the bottoms to the tops of the flowers
- Lay out the greenery and flowers on your craft space
- Attach some Press n' Seal to just the greenery
- Leaving the flowers behind (don't worry if they move a bit) lift the greenery, remove the release paper and place on the card
- Add the flowers to the card using Stampin' Dimensionals
- Add the greeting with Stampin' Dimensionals
- Add the white layer to the Darling Duckling rectangle
- Attach the whole thing to the card base
Dimensions and Measurements
- Basic White – 8 1/2″ x 5 1/2″
- Darling Duckling – 5 1/4″ x 4″
- Basic White – 4 3/4″ x 3 1/2″
- scrap for greeting rectangle die
- scraps for flowers and greenery
Your Turn
This was a fun card to create. I hope you give it a try. Be sure to leave a comment if you'd like to see me construct this in a video. Of course I'll change it up a bit to make it unique, but you'll still get to see me use all the tips in this post.
Thanks for Stopping By
I really appreciate you reading all the way to the end of the blog post. It really helps my business a lot! Have you checked out the post using the larger dies from this set? Enjoy your day!
xo, Linda

![With You In Mind Photopolymer Stamp Set (English) [ 164747 ] With You In Mind Photopolymer Stamp Set (English) [ 164747 ]](https://assets1.tamsnetwork.com/images/EC042017NF/164747s.jpg)
![Textured Notes Dies [ 165555 ] Textured Notes Dies [ 165555 ]](https://assets1.tamsnetwork.com/images/EC042017NF/165555s.jpg)
![Strawberry Slush Classic Stampin' Pad [ 165286 ] Strawberry Slush Classic Stampin' Pad [ 165286 ]](https://assets1.tamsnetwork.com/images/EC042017NF/165286s.jpg)
![Strawberry Slush Classic Stampin' Ink Refill [ 165282 ] Strawberry Slush Classic Stampin' Ink Refill [ 165282 ]](https://assets1.tamsnetwork.com/images/EC042017NF/165282s.jpg)



![Multipurpose Liquid Glue [ 110755 ] Multipurpose Liquid Glue [ 110755 ]](https://assets1.tamsnetwork.com/images/EC042017NF/110755s.jpg)
![Silicone Craft Sheet [ 127853 ] Silicone Craft Sheet [ 127853 ]](https://assets1.tamsnetwork.com/images/EC042017NF/127853s.jpg)
![Take Your Pick [ 144107 ] Take Your Pick [ 144107 ]](https://assets1.tamsnetwork.com/images/EC042017NF/144107s.jpg)
Leave A Comment