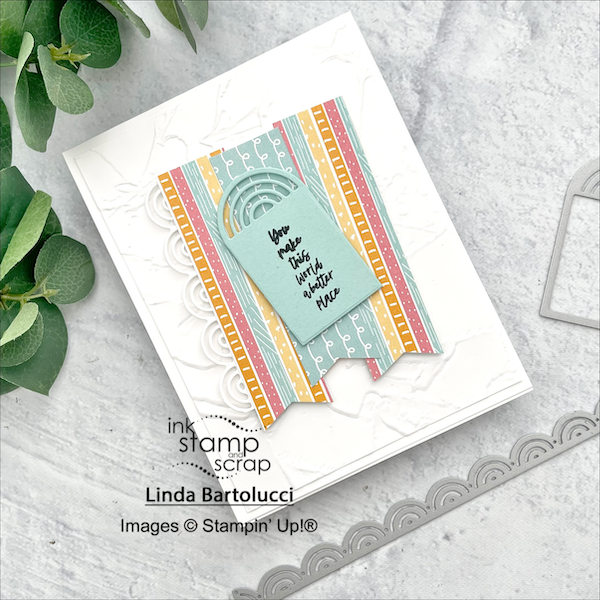
I had so much fun making this card that I used the basic design principles to create today's care – Lots of Layers featuring Rainbow of Happiness. It's just so easy to make an interesting focal point of the card by adding the layers a little skewed back-and-forth. Have you tried making a card layering this way? Leave a comment and let me know.

You’ll want to cut your layers like this:
- Basic White card base – 11″ by 4 1/4″ score at 5 1/2″
- Basic White – 5 1/4″ by 4″
- Sunshine & Rainbows DSP – 3 pieces 3 1/2″ by 1″
- Basic White scrap – 3 1/2″ by 1″ (or more)
- Pool Party scrap – 3″ by 2″ (or more)
To create the layers of this card:
- Fold and score the Basic White card base
- Use your Stampin' & Emboss Machine to:
- Dry Emboss the Basic White layer with Painted Texture
- Die cut the border and rainbow tag with Basic White and Pool Party
- Attach the Painted Texture layer to the card base with Liquid Glue
- Punch the end of all three Sunshine & Rainbows paper strips; then trim one down by about an inch
- Attach the rainbow border to the left side of a longer paper strip with Liquid Glue
- Attach all the paper strips to the center of the Basic White layer using Stampin' Dimensionals
- Stamp the greeting on the rainbow tag
- Add the rainbow tag to the paper strips with Stampin' Dimensionals
Stampin' Up! Supplies
Click on a picture to shop at My Store
")
")


Thank you for stopping by today, please be sure to . . .
- Receive a FREE PDF tutorial when you subscribe to my emails here.
- Earn up to a $50 shopping spree with my Ink Stamp and Scrap Rewards Program.
- Check out the clearance rack and save up to 70%.
- Save 10% on coordinating product bundles!
- The $99 Starter Kit is the best deal of ALL! Discounts & benefits here
- Visit my gallery for paper crafting ideas.
- Follow me on Pinterest.
- Follow me on Instagram.
- Subscribe to my YouTube paper crafting video tutorials.
Leave A Comment