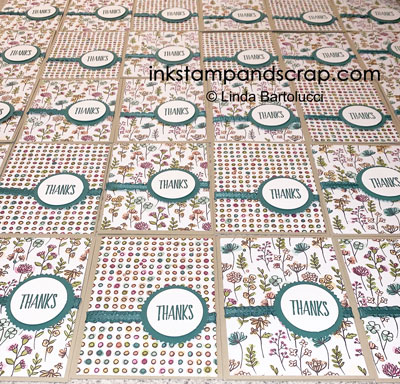
I took this cascade of customer thank you cards picture before I signed, sealed and mailed them. As I've been commenting frequently the past few weeks, I'm catching up and feeling great about it. I was way behind on sending thank you cards. My solution: Designer Series Paper and lots of it. This is a quick solution to making lots of pretty cards quickly!
To construct this cascade of customer thank you cards here's what I did:
- Cut, fold, burnish and set aside the 4 1/4″ by 11″ card base in Crumb Cake
- Cut a 4″ by 5 1/4″ piece of Designer Series Paper
- Wrap a piece of ribbon around the paper and attach with Snail
- Stamp Thanks on Whisper White scrap
- Punch out with 1 3/4″ circle punch
- Punch Tranquil Tide card stock with Starburst punch
- Layer circles with dimensionals and use more dimensionals to attach around ribbon
- Use Snail to attach paper layer to card
If you plan to mass produce these as I did you should:
- Do all your stamping, punching, cutting and folding first
- Layer all the ribbons
- Dimensional all the circles
- Attach the circles to the ribbon
- Assemble the cards

If you're not on my email list then you probably missed my announcement about the BIG Stampin' Up! sale over the Thanksgiving, Black Friday, Small Business Sunday and Cyber Monday holiday. Wow! That's a mouthful:) I will be sending out all the details at 4AM on Friday, November 23. Included with the Stampin' Up! special is my complimentary special. You should jump on my email list to get these details and more exclusive tips and tutorials!
I suspect after this weekend I will be making cards to take another cascade of customer thank you cards picture to share. You're going to love this special!


Leave A Comment